 Skip to content
Blog
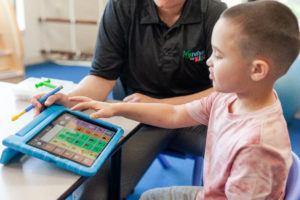
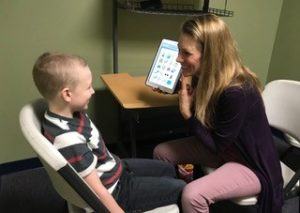
Applied behavior analysis, also known as ABA or ABA therapy, is a research-based treatment that has been shown to be effective for individuals with a variety of behavioral and developmental conditions.
It is more comprehensive than early intervention and is most commonly used to address problematic or dangerous behaviors and to improve skill deficits for individuals that have been diagnosed with autism.
Although ABA therapy can be effective for a wide range of individuals, years of research show that the strategies and processes to be the most effective for children before the age of five.
Early intervention can reduce behaviors that may have become engrained or routine. Early intervention also has greater chance of building pivotal developmental skills. Through a comprehensive approach, early intervention can include a focus on communication, language, play, self-help/adaptive, learning readiness, and social skills, as well as a reduction of challenging behaviors.
Programming is research based and tailored to each child’s specific needs and should include the adults in the child’s life to encourage skill growth and generalization outside of therapy sessions.
Starting early intervention can mean you’re catching and correcting issues at a critical point in the development of your child, changing their developmental path.
Written By:
Adrienne Oaks, M.Ed.
BCBA, COBA / Clinical Director

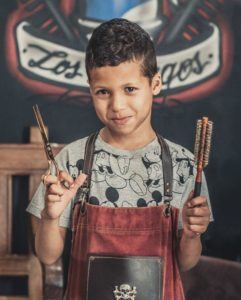
Removing the fear of sight and sound of the clippers/scissors
- Slowly introduce clippers/scissors placing across the room and moving closer as tolerated
- Once tolerated nearby, slowly introduce sound by turning clippers on across the room and moving closer as tolerated
- Present preferred activity for distraction during introduction of clippers/scissors
- Utilize vibrating massager to desensitize sound of clippers
Removing the fear of the touch with clippers or hair
- Use of vibrating massager progressing from tolerating touch on extremities progressing to tolerating touch on various locations of head/neck
- Use of feathers and other items similar in texture to hair to play a game encouraging tolerating touch to different parts of the body including neck, arms, back, ears.
- Brushing protocol
- Encourage messy play
- Deep pressure/massage to scalp
Compensatory Strategies
- Use of tools to reduce noise
- Headphones or earplugs
- Preferred music
- Use of scissors if clippers can’t be tolerated
- Wet hair instead of dry
- Use of something to prevent hair from touching skin
- Visor
- Turtleneck or towel
- Clippers that collect hair
- Hairdryer to blow hair
- Showering immediately following haircut
- Use of calming strategies during task
- Weighted blanket/compression clothing
- Fidget
- Preferred activity
- Brushing protocol
Tip: allow child to have some control by providing choices with use of compensatory strategies.
Additional Strategies
- Use of social stories
- Watching videos on hair cutting
- Pretend play with dolls or stuffed animals
- Playdough hair cutting tools
- Use of rewards
- Favorite activity for distraction
- Step by step picture schedule
- Timer
- Hair cutting apps (ex: Hair Salon)
- Slow, fun, non pressured progression of steps
- Engage child in activity by giving them a job (ex: hairdryer)
Tips: establish pleasant memories of hair cutting and replace unpleasant memories and increase frequency of task to keep pleasant thoughts in recent memories
For more information, visit http://www.abcpediatrictherapy.com

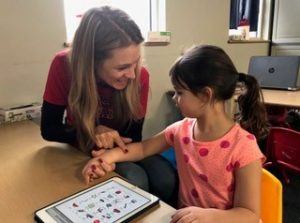
Social Stories
What is a social story? A social story tells about a social experience a child may encounter whether it be at home, school, the playground; anywhere at all. They are learning tools for teachers, therapists and parents to utilize when teaching children about a social situation and helping to provide guidance for when they encounter the situation. They often depict a lesson, a skill, or a particular concept that children are likely to encounter. They are written in short sentences in a sequential order with pictures so they are easy for a child to understand and to learn from. Reading a social story to your child may help them to understand what to do if they encounter a similar social situation and may decrease their fear or anxiety. It is recommended to read the story with the child on more than one occasion to help them learn, cope, and understand appropriate social skills. For instance, if there is a particular event you are using a social story for, it would be recommended to read the story with the child several times on different occasions leading up to the situation in order for the child to handle the situation more positively.
There is a format to follow when writing a social story. The first step is to determine the topic for which the social story is going to be written about. From there the author must gather information on the topic, create a social story following the proper format, and then provide images that go along with the social story.
When writing a social story, it is important to include the 5 W’s of who, what, when, where and why. There are two main types of sentences used in a social story, a descriptive sentence and a directive sentence. Descriptive sentences describe thoughts or feelings, express opinions, or include what others can do to help in a situation. Directive sentences identify possible responses to the social situation or direct behavior to the proper response in a social situation. A good rule of thumb for these stories is to include at least 2 descriptive sentences to each directive sentence. After the social story is written, include pictures to go along with the lesson or concept of the story and there you have it!
Therapists at ABC are here to help children with transitions in a variety of ways, including the use of social stories.
For more information, visit www.abcpediatrictherapy.com.
References:
https://vkc.mc.vanderbilt.edu/assets/files/tipsheets/socialstoriestips.pdf
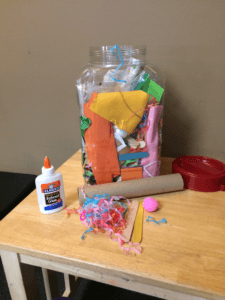
Sensory Bottles

What a fun and easy activity to do in your home with your child! Calming bottles are great for sensory play and to calm an anxious child.
What you will need:
- A clear bottle with lid
- food coloring
- items you want to put in your bottle (beads, glitter, Legos) You decide!
- water
- baby oil
- glue
Directions:
- Fill bottle 1/2 water
- Fill bottle 1/2 baby oil
- Insert desired items you want in your calming bottle
- Drop your food coloring to your desired color
- Glue your lid so child is not able to open
- Enjoy!
Watch our instructional video below:
The following are several different activities that you could do at home, both inside and outside, for your 4-5 year old kiddo.
Inside Activities:
« Walking backwards – practice walking backwards between rooms, or make it into a game such as doing a puzzle or between turns of a board game. This helps improve balance and coordination.
« Jumping jacks – jumping jacks involve strength and coordination, which means this can be a hard task to learn. Sometimes having the kiddo do them in front of a mirror, or doing them with you while facing you helps. You can also break down the activity by doing arms only, then legs only, then putting them together at a slower pace.
« Sit ups – start by having them lay on the floor with knees bent, start with arms in front of them, reaching up towards their knees or giving you high-fives. As this gets easier, have them cross their arms over their chest. Make sure that they are keeping their body straight rather than rotating.
« Push-ups – you can start with push-ups with the kiddo on their knees rather than their feet, until it gets easier. This can be done during TV commercials, between turns on a game, etc.
« Skipping and Galloping – this can be done inside if there is enough room, or outside. You can have the kiddo practice this while going from room to room, or playing a game. If skipping is too hard, break down the task by having them practice slowly with a “step-hop, step-hop”.
Outside Activities:
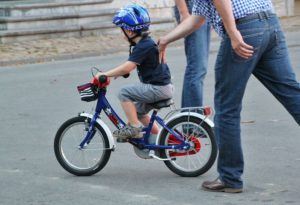
« Bike riding – at the age of 4, a kiddo should start to be able to ride a 2-wheeled bike with training wheels. Practicing this task allows the kiddo to build strength, endurance, coordination, and balance. Start in a straight line until they get the hang of it, then add in turns. Around age 5, the kiddo should transition to riding a bike without training wheels.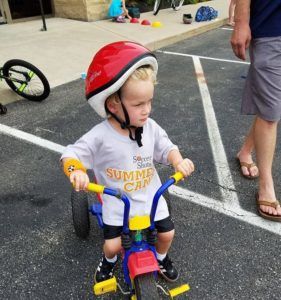
« Riding a scooter – if available, have the kiddo practice a 3-wheeled scooter whether it be in the driveway, neighborhood, or park. Once they get confident with being able to ride a scooter without falling off, work on coasting or gliding by having them do a big push and then try to keep their foot off of the ground for as long as they can. Eventually, they should be able to progress to a 2-wheeled scooter.

« Ball skills – practicing catching, throwing, and kicking helps build strength, coordination, and balance. At this age, work on throwing overhand and underhand while hitting a target from 12 feet away, catching a small ball with hands only from at least 5 feet away, bouncing and catching a ball, kicking a ball 12 feet in the air (ex: kickball), and drop kicking a ball with direction (towards a target).
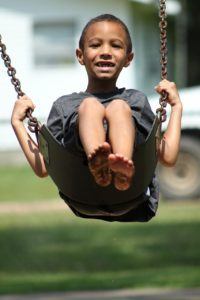
« Swing – at the age of 4 ½ years old, kiddos should be able to swing by pumping their own legs. To help kiddos learn to pump their legs, stand in front of them with your hands held out as a target, telling your kiddo to “kick my hands with both feet at the same time”. Follow that by asking them to bend their legs backward. This will help improve their coordination.
« Jump rope – jumping rope is a great activity that can be fun while challenging their strength, timing, and coordination. A child first learns to jump rump over a rope that is turned by someone else. If you do not have a second person to turn the rope, try tying the other end on a nearby surface; make sure it is not too low or too high. As this gets easier, try transitioning to self-turned jumping rope, which requires more attention, timing, and coordination. A child should be able to do this around age 5.
If you are unsure of what your child should do and when, complete a free screening of your child at http://checklist.abcpedatrictherapy.com.
Visit our website https://www.abcpediatrictherapy.com for more information on child development.
The following are several different activities that you can do at home, both inside and outside, for your 2-3 year old kiddo.
Inside Activities:
« Practicing Stairs – walking upstairs reciprocally (one foot passing the other), progressing from use of one handrail to no handrail. To make it fun, make it into a game with building blocks or with putting a puzzle together.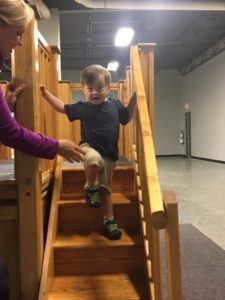
« Standing on One Leg – improve their balance and hip strength by practicing standing on one leg for 3 seconds. First start without hands on their hips, and progress towards hands on hips as this makes it harder. To make it more interesting, try doing this while playing a game (stopping every 3 turns), coloring at a table while standing, or watching TV for example.
« Alligators – this is a simple hip strengthening exercise that will help improve their stability and strength for stairs, balance, and walking. You have them start by laying on their side, slowly raise the top leg, and slowly lower. To make it more fun, have a stuffed animal between their legs, and “chomp” down slowly as if they are an alligator.
« Bridges – this is a simple core and leg strengthening exercise. You have them start by laying on their back with knees bent, lift their bottom up off of the ground (forming a “bridge”), and slowly lower down. To make this more fun, have a small animal, car or favorite toy pass under each time as they “open” and “close” the bridge.
Outside Activities:
« Going down the slide – whether at home or at a park, the slide can be a fun activity for kiddos. At this age, a kiddo should be able to climb up the jungle gym and go down the slide by themselves while being able to sit upright without falling over.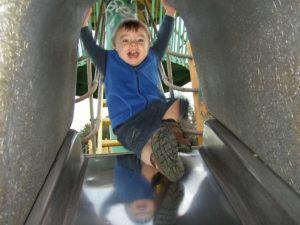
« Soccer – practicing kicking a stationary ball towards a target, whether that be you (caregiver), another kiddo (friend/sibling), a soccer goal, or some other creative target from about three-to-six feet away.
« Playing catch – practicing catching a larger ball by bringing/trapping to their chest rather than with just their hands, and progress towards hands-only after they get consistent with trapping. This can be made into a game with basketball, catching stuffed animals, etc.
« Bike Riding – practicing bike riding can be done inside or outside depending on the space available. At this age, a child should be able to ride a small push bike; a bike without pedals where the kiddo uses their feet on the ground to move themselves. They should also be progressing towards the use of a tricycle around the age of 3. This activity is fun while helping to build strength and coordination.
If you have questions about what your child should be doing and when visit http://checklist.abcpediatrictherapy.com for a free screening.
Visit our website at https://www.abcpediatrictherapy.com for information on child development.
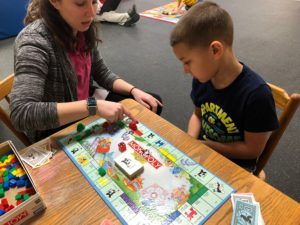
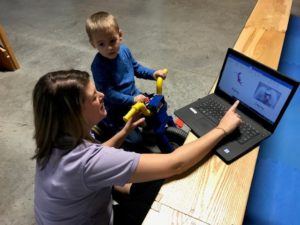
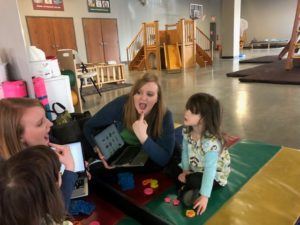
THERAPY IS PLAY!
Occupational therapy from a parent’s perspective: Why is the therapist playing with my child, and why am I paying for someone to play with my child when I could do this at home?
Occupational therapy from an OT’s perspective: How can I make this fun and purposeful, while giving this child a challenge?
OT’s have a method to their madness, a purpose to their play, an underlying skill to work on with every move. We just disguise therapy with play…because let’s face it…if a child thinks they are “working” they won’t be as motivated to participate!
Play is a child’s number one occupation; it is intrinsically motivating and FUN! What children don’t know? It is also a learning experience. Children are like sponges; as they interact with objects, their environment, and the people around them, they are soaking up all of the wonderful skills needed for future occupations such as being a student, completing chores, and playing with friends!
So…what’s the difference between play at home and play at therapy?
As occupational therapists introduce toys and play into their sessions, we are continuously looking for the just right challenge for your child. This means we are allowing them to learn new skills with our support, but without overwhelming them in the process. As we assess their skill level during play, we are also able to provide modifications to the activity and are able to grade the level of difficulty up or down based on your child’s specific ability.
Examples of this could be: sitting on a therapy ball while playing a game to activate postural muscles, coloring on a vertical surface to improve shoulder stability, or using tongs to pick up game pieces rather than their hands for fine motor control and strengthening.
Each toy and activity used during therapy is specifically chosen to cater to the individual needs and abilities of your child. When choosing a toy or activity, some of the things occupational therapists consider are:
-What does their grasp or release on objects look like?
-How is their postural control and shoulder stability?
-Are their movements intentional and fluid, and are they able to move their arms and legs both individually and simultaneously?
-How are they manipulating, exploring, and interacting with the toys? Is their play purposeful and functional?
-Are they aware of their environment and the others around them?
-Are they able to follow multi-step directions?
This is just a glimpse into what play looks like from an OT perspective. That’s why we allow the last few minutes of our sessions for Q&A with you, the parents! We are a team, and we want you to understand the goals for your child, and the path to master those goals. The home exercise programs created for you and your child are imperative to seeing the most success. We encourage you to ask questions when you are uncertain about anything!

Is your child becoming bored on snowy or rainy days? These are great days to spark creativity and imagination! By allowing your child the ability to be creative without specific instructions or a model promotes independence and problem-solving skills. One way to promote creativity is through “free art”, which allows the child to create anything they desire without “rules” (except for safety, of course!). The amazing thing about free art is anything can be used to create amazing pictures, cars, buildings, etc.
The following is a list of craft supplies likely already in your home to help spark creativity:
- Paper plates
- Paper towel rolls

- Cotton balls
- Newspaper
- Yarn
- Stickers
- Q-tips
- Shoe boxes
- Egg carton
- String
- Paper cups
- Construction paper
- Straws
- Masking tape
- The possibilities are endless!
The ability to work independently is an important skill to support development, success in the school setting, and later in life! Children do not learn independence unless they are given opportunity!

It’s is important to use the correct language to complement a child’s work. Phrases like “what is it?” or “I like your dog” may decreased self- confidence. If the child believes the creation is obvious to the observer (house, etc.) or if the final product is a cat instead of a dog, it is likely the child’s self-confidence will decrease. Asking open-ended statements or questions such as “You worked very hard!” or “Tell me about what you made!” will help boost self-confidence and social skills.
Before throwing away the paper towel roll, save it for your child’s next creative project!
Take a look at our developmental checklist at http://checklist.abcpediatrictherapy.com to see what fine motor to challenge in your child and when.
Visit our website at https://www.abcpediatrictherapy.com to answer any questions about your child’s development you might have.
If you and others are having a difficulty time understanding what your child is saying and they are demonstrating speech sound errors, your child likely has an articulation or phonological disorder. Don’t let the long names or the word “disorder” intimidate you! These are simply referring to the intelligibility (or clarity) of your child’s speech and can be remediated by a speech-language pathologist. Here is a great chart to follow:

If your child is producing some speech sound errors beyond what is typical for their developmental age, and are considered “mildy” unintelligible, it is likely an articulation disorder.
Articulation Disorder- strategies for home carryover
1) Practice your child’s speech sound being targeted in therapy in a mirror!
2) Practice your child’s speech sound in a book! This will increase their awareness of the targeted sound. Find books from your local library that have repetitive words with the appropriate speech sounds to target. (For example, if the sound is /g/, try “Go Dog GO!” by P.D. Eastman)
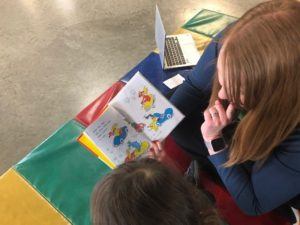
3) Draw attention to your mouth while speaking and use cues to your mouth so that the child can follow your cues for correct speech production on the targeted sounds.
If your child is “highly” unintelligible due to an excessive use of phonological processes that are typical for development, then it is likely a phonological disorder. Please refer to the phonological processes chart from the American-Speech and Hearing Association (ASHA) here: https://www.asha.org/Practice-Portal/Clinical-Topics/Speech-Sound-Disorders-Articulation-and-Phonology/Selected-Phonological-Processes/
Phonological Disorder- strategies for home carryover
1) If your child is deleting final speech sounds in words, make a “snake” down your arm with your pointer finger and “stop” the snake to mark the final speech sound.
2) To increase awareness of speech sounds, hide your mouth using a small piece of paper and say a targeted word (with the speech sound targeted) correctly and correctly to see if your child can hear the difference and ask them to give you a “thumbs up!” or “thumbs down” to that word with the speech sound. (pic as follows) For example, say “ship” and “sip” if the child is having a difficult time producing the /s/.
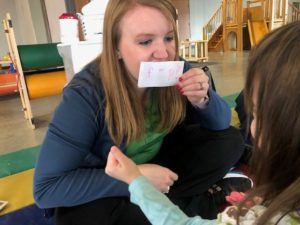
3) Minimal pair practice- using rhyming words that have the initial speech sound being substituted with the appropriate production. For example, if a child is producing the s/z, you would have the child say “sip” and “zip” or “sap” and “zap” so they can feel the difference of productions and increase their awareness of productions and practice the sounds.
At ABC, our ASHA certified and licensed speech-language pathologists can help remediate speech sound errors. Learning through play is crucial to your child’s development and we provide a sensory-enriched experience to allow for kids to target their speech sounds in a fun, play-based approach! Please visit our website https://www.abcpediatrictherapy.com for answers to your questions.
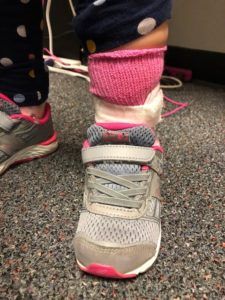
Orthotics are used for many different reasons, and can help kiddos achieve their goals. However, most parents do not know what to expect when getting orthotics for the first time. Here you will find some information that is good to know for first time orthotic users.
Wear Schedule – when wearing orthotics for the first time, it is important to know that the kiddo does not wear them 24/7 right away. Their skin, feet, and sensory system needs to accommodate to this new feeling and new positioning. Therefore, it is recommended the child start off wearing the orthotics for about 1 hour, which is typically done during the therapy session when they receive them. If the child is tolerating them well and the orthotics seem to fit correctly without need for adjustments, you slowly build tolerance by adding another hour until they are able to tolerate wearing them all of the time.

Monitor for Redness – as mentioned above, the kiddo’s systems need to get used to this new thing on their feet and this new positioning it puts their feet in. Therefore, it is normal that there may be mild pink or red areas that go away within 30 minutes or less once the orthotics are taken off. However, it is important to monitor these areas, especially if a deeper or more vibrant red color as this could indicate areas where the brace may need altered. This type of redness will take longer than 30 minutes to begin to fade. If this occurs, stop usage of the orthotics and give the therapist a call so we can assess what changes need to be made.

Shoes – majority of orthotics are designed to be worn with shoes. However, shoes that fit orthotics can be difficult to find, especially since kids grow so fast. It is recommended that you wait to buy new shoes until you have the orthotics in person, that way you can make sure they fit in the shoe before you buy them. A wider shoe usually works better, such as New Balance. There are also shoes designed to better fit orthotics, such as Plae and Striderite. However, any shoe that fits your child’s foot with the orthotic will work; there is no one particular brand that you must buy. 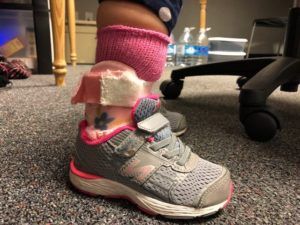
If you have any questions about the ordering process, about the fit of your child’s orthotics, or if you think orthotics may help your child, please reach out to your kiddo’s therapist. We love to help and answer all questions in order to provide the best care possible.