 Skip to content
gross motor
The following are several different activities that you could do at home, both inside and outside, for your 4-5 year old kiddo.
Inside Activities:
« Walking backwards – practice walking backwards between rooms, or make it into a game such as doing a puzzle or between turns of a board game. This helps improve balance and coordination.
« Jumping jacks – jumping jacks involve strength and coordination, which means this can be a hard task to learn. Sometimes having the kiddo do them in front of a mirror, or doing them with you while facing you helps. You can also break down the activity by doing arms only, then legs only, then putting them together at a slower pace.
« Sit ups – start by having them lay on the floor with knees bent, start with arms in front of them, reaching up towards their knees or giving you high-fives. As this gets easier, have them cross their arms over their chest. Make sure that they are keeping their body straight rather than rotating.
« Push-ups – you can start with push-ups with the kiddo on their knees rather than their feet, until it gets easier. This can be done during TV commercials, between turns on a game, etc.
« Skipping and Galloping – this can be done inside if there is enough room, or outside. You can have the kiddo practice this while going from room to room, or playing a game. If skipping is too hard, break down the task by having them practice slowly with a “step-hop, step-hop”.
Outside Activities:
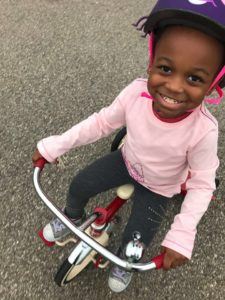
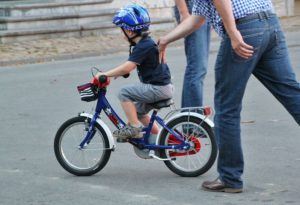
« Bike riding – at the age of 4, a kiddo should start to be able to ride a 2-wheeled bike with training wheels. Practicing this task allows the kiddo to build strength, endurance, coordination, and balance. Start in a straight line until they get the hang of it, then add in turns. Around age 5, the kiddo should transition to riding a bike without training wheels.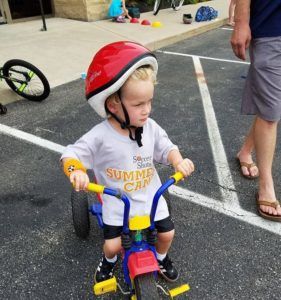
« Riding a scooter – if available, have the kiddo practice a 3-wheeled scooter whether it be in the driveway, neighborhood, or park. Once they get confident with being able to ride a scooter without falling off, work on coasting or gliding by having them do a big push and then try to keep their foot off of the ground for as long as they can. Eventually, they should be able to progress to a 2-wheeled scooter.

« Ball skills – practicing catching, throwing, and kicking helps build strength, coordination, and balance. At this age, work on throwing overhand and underhand while hitting a target from 12 feet away, catching a small ball with hands only from at least 5 feet away, bouncing and catching a ball, kicking a ball 12 feet in the air (ex: kickball), and drop kicking a ball with direction (towards a target).
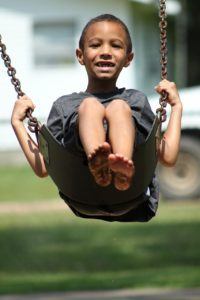
« Swing – at the age of 4 ½ years old, kiddos should be able to swing by pumping their own legs. To help kiddos learn to pump their legs, stand in front of them with your hands held out as a target, telling your kiddo to “kick my hands with both feet at the same time”. Follow that by asking them to bend their legs backward. This will help improve their coordination.
« Jump rope – jumping rope is a great activity that can be fun while challenging their strength, timing, and coordination. A child first learns to jump rump over a rope that is turned by someone else. If you do not have a second person to turn the rope, try tying the other end on a nearby surface; make sure it is not too low or too high. As this gets easier, try transitioning to self-turned jumping rope, which requires more attention, timing, and coordination. A child should be able to do this around age 5.
If you are unsure of what your child should do and when, complete a free screening of your child at http://checklist.abcpedatrictherapy.com.
Visit our website https://www.abcpediatrictherapy.com for more information on child development.
The following are several different activities that you can do at home, both inside and outside, for your 2-3 year old kiddo.
Inside Activities:
« Practicing Stairs – walking upstairs reciprocally (one foot passing the other), progressing from use of one handrail to no handrail. To make it fun, make it into a game with building blocks or with putting a puzzle together.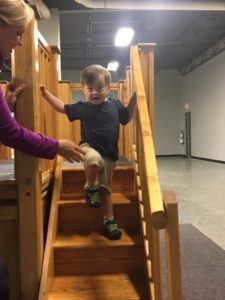
« Standing on One Leg – improve their balance and hip strength by practicing standing on one leg for 3 seconds. First start without hands on their hips, and progress towards hands on hips as this makes it harder. To make it more interesting, try doing this while playing a game (stopping every 3 turns), coloring at a table while standing, or watching TV for example.
« Alligators – this is a simple hip strengthening exercise that will help improve their stability and strength for stairs, balance, and walking. You have them start by laying on their side, slowly raise the top leg, and slowly lower. To make it more fun, have a stuffed animal between their legs, and “chomp” down slowly as if they are an alligator.
« Bridges – this is a simple core and leg strengthening exercise. You have them start by laying on their back with knees bent, lift their bottom up off of the ground (forming a “bridge”), and slowly lower down. To make this more fun, have a small animal, car or favorite toy pass under each time as they “open” and “close” the bridge.
Outside Activities:
« Going down the slide – whether at home or at a park, the slide can be a fun activity for kiddos. At this age, a kiddo should be able to climb up the jungle gym and go down the slide by themselves while being able to sit upright without falling over.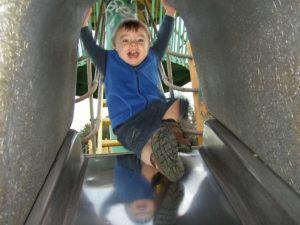
« Soccer – practicing kicking a stationary ball towards a target, whether that be you (caregiver), another kiddo (friend/sibling), a soccer goal, or some other creative target from about three-to-six feet away.
« Playing catch – practicing catching a larger ball by bringing/trapping to their chest rather than with just their hands, and progress towards hands-only after they get consistent with trapping. This can be made into a game with basketball, catching stuffed animals, etc.
« Bike Riding – practicing bike riding can be done inside or outside depending on the space available. At this age, a child should be able to ride a small push bike; a bike without pedals where the kiddo uses their feet on the ground to move themselves. They should also be progressing towards the use of a tricycle around the age of 3. This activity is fun while helping to build strength and coordination.
If you have questions about what your child should be doing and when visit http://checklist.abcpediatrictherapy.com for a free screening.
Visit our website at https://www.abcpediatrictherapy.com for information on child development.
Orthotics are used for many different reasons, and can help kiddos achieve their goals. However, most parents do not know what to expect when getting orthotics for the first time. Here you will find some information that is good to know for first time orthotic users.
Wear Schedule – when wearing orthotics for the first time, it is important to know that the kiddo does not wear them 24/7 right away. Their skin, feet, and sensory system needs to accommodate to this new feeling and new positioning. Therefore, it is recommended the child start off wearing the orthotics for about 1 hour, which is typically done during the therapy session when they receive them. If the child is tolerating them well and the orthotics seem to fit correctly without need for adjustments, you slowly build tolerance by adding another hour until they are able to tolerate wearing them all of the time.

Monitor for Redness – as mentioned above, the kiddo’s systems need to get used to this new thing on their feet and this new positioning it puts their feet in. Therefore, it is normal that there may be mild pink or red areas that go away within 30 minutes or less once the orthotics are taken off. However, it is important to monitor these areas, especially if a deeper or more vibrant red color as this could indicate areas where the brace may need altered. This type of redness will take longer than 30 minutes to begin to fade. If this occurs, stop usage of the orthotics and give the therapist a call so we can assess what changes need to be made.

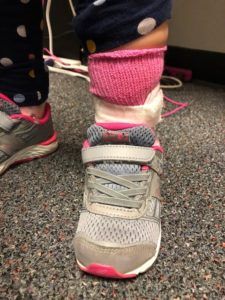
Shoes – majority of orthotics are designed to be worn with shoes. However, shoes that fit orthotics can be difficult to find, especially since kids grow so fast. It is recommended that you wait to buy new shoes until you have the orthotics in person, that way you can make sure they fit in the shoe before you buy them. A wider shoe usually works better, such as New Balance. There are also shoes designed to better fit orthotics, such as Plae and Striderite. However, any shoe that fits your child’s foot with the orthotic will work; there is no one particular brand that you must buy. 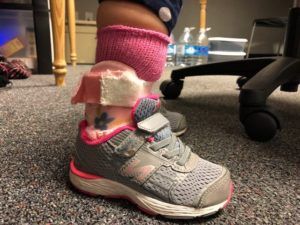
If you have any questions about the ordering process, about the fit of your child’s orthotics, or if you think orthotics may help your child, please reach out to your kiddo’s therapist. We love to help and answer all questions in order to provide the best care possible.
Look what I can do!
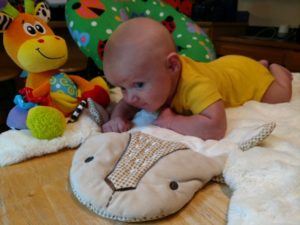
At 0-3 months old, I will be able to start holding my head up when placed on my tummy. At first, I will be looking straight down, but with practice, I will be able to lift it even higher. Make sure my arms are under me so I learn to push up.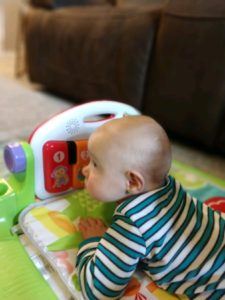
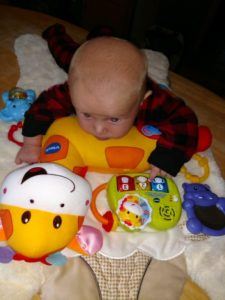
At 3-6 months old, I will be able to push up more through my arms so I can really look around. I will be able to reach for toys and bring them to my mouth. Make sure I have plenty of toys!
At 6-9 months old I will start to move around while on my tummy. I will pivot and I may learn to move backwards before I am strong enough to move forward. I love to explore!
At 9-12 months old I will be strong enough to push up onto my hands and knees for crawling. Watch out, world! Here I come!
Tummy time should always be supervised and done when your child is awake.
Tummy time should be done when your baby is happy – not tired or hungry.
Tummy time should not be done right after your baby has eaten. This can put pressure on a full tummy and cause your baby to spit up.
Perform tummy time for short intervals (10 minutes), several times per day.
Use a nursing pillow or small towel roll under the arms. This takes some of the weight off of the arms, making it easier to lift his head.
Use toys and music to make it fun.
Get on the floor so your baby can look at you.
Hold your baby on your chest, facing you, and recline back so you are face to face.
Babies loves to hear your voice and see your face!
When and how much?
Tummy time is needed every day and should begin the first day you bring your infant home from the hospital.
 Start with just a few minutes at a time, several times per day. Gradually build up, as your baby is able to tolerate more.
Why tummy time?
Tummy time helps your baby get stronger in order to develop his skills.
Tummy time is needed to promote motor skills such as sitting up and crawling.
It strengthens the hands for holding onto toys or a bottle and helps to develop vision.
Babies who do not spend time on their tummy are more likely to have delays in their motor skills.
What if my baby doesn’t like it?
Hang in there and keep trying! With practice and toys to make it fun, your child will learn to enjoy it.
Keep that perfectly shaped head
Babies who are placed too much in swings, car seats and on their backs and not enough on their tummy can end up having a misshapen head.
Putting your baby on his tummy several times throughout the day keeps pressure off of the back of the head and keeps that perfectly round little head.
Avoid having your baby sleep in a swing or car seat, if you can. Babies should be placed on their backs to sleep on a flat surface. The flat surface allows your baby to turn his head to either side, helping to form the perfect head shape.
Tummy time should be fun and provide learning opportunities.
Remember to place your child on their back to sleep.
If you have questions about your child’s development, visit https://www.abcpediatrictherapy.com. We love to help!
What is it?
A tool to help parents know what their child should be doing and when. 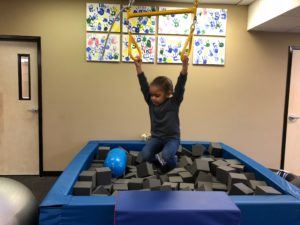
How does it work?
It is simple. Simply plug in your child’s birthdate. The gross motor, fine motor, language and sensory tasks that your child should do at that age will pop up. Answer the questions indicating what your child can and cannot do.
After submitting the tool, you will receive an email with tips and tricks on how to help your child at home. You also receive a FREE developmental checklist of all the skills a child should do between the ages of 1 and 6 years old.
Practice these age appropriate skills with your child. We hope you have success challenging them!
Let us know if we can help you.
Why did ABC Pediatric Therapy develop this tool?
ABC found that many parents do not know what to encourage and when. We want to help! This tool will teach you what toys to have and what skills to challenge at what age. Educate yourself! Be the best parent you can be! Challenge your child’s skills!
Who would find this tool useful?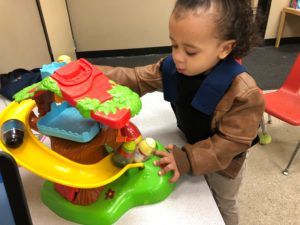
Any parent of a child under the age of 6 years old.
You can find this Interactive Screening Tool at checklist.abcpediatrictherapy.com. We hope you find it useful!
Visit our website at https://www.abcpediatrictherapy.com for more information on child development.


The holidays are just around the corner and family and friends will be wondering what to get your child this year. With hours spent at school, popular video games and TV shows, children are sitting more and more. This year consider some of the following ideas to get your child moving and help support their development!
Gift ideas for Elementary aged children:
-kinetic sand or sand box with shovel and bucket
-make your own sensory bins: fill containers with beans, rice, water beads, etc and hide holiday items inside for your child to find
-Print your own Christmas songs with movement book such as this one from: https://www.fantasticfunandlearning.com/christmas-songs.html
-cookie/gingerbread decorating kit
-Puzzles
-velcro dart board
-bean bags – great for a variety of games such as a child sized corn hole game or large-scale tic tac toe
-social skills board game
-fine motor tools kit
-Bike
-building sets such as lego or playmobile
-swing set or single swing that can be used indoors
-playground set
-toys with latches and keys
-chalkboard/dry erase board with writing tools and magnets
-art supplies
– lacing kits
-sports kits (goal with soccer ball, t-ball set, golf set, hockey sticks and net, basketball hoop, etc)
-get creative with obstacle courses to get your child up and moving: you can wrap your own kit with balance discs or domes, hurdles, tunnels, etc. You can also use household items such as cushions and steps to set up during play time. Doing a puzzle by crossing the obstacle course to place it in, is a fun way to make your gifts even more interactive
-put a holiday spin on household favorites. For example, if your child loves playdough, you can make your own candy cane dough, put tinsel/sparkles inside of the dough, or make your own slime!
If you have questions about your child’s development, visit our website at https://www.abcpediatrictherapy.com

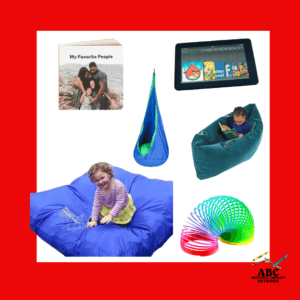
Coming up to the holiday season, many parents have questions about the best toys for their toddlers. Our day to day routines have evolved to promote children spending time in “containers.” This can be sitting in a car seat, jumpers, activity chairs, long periods in high chairs, etc. While convenient and necessary, it is also important to encourage your child to have plenty of breaks from these devices and get them moving around and playing with toys that stimulate different body systems. This holiday season, consider some of the following ideas to help promote your toddler’s development:
- Wooden blocks/mega blocks
- Connecting toys such as pop beads
- Stacking peg board


- Stacking rings
- Activity tables to promote standing and cruising
- Bubbles
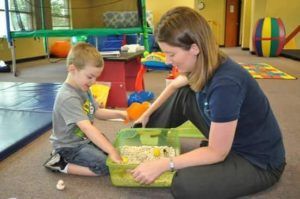

- Make your own sensory bins; fill different containers with beans, rice, cereal, water beads, etc and hide holiday objects to find inside
- You can make your own Candy Cane cloud dough for a themed option. Recipe here: http://www.growingajeweledrose.com/2012/12/candy-cane-clouds-sensory-activity.html
- Playground ball, soccer ball, basketball, etc.
- Art station
- You can set up a station to play with puff paint or shaving cream and “draw” with fingers; this idea works great on a mirror or flat, easy to clean table surface
- Non-toxic art supplies
- Palm grip crayons
- Large chalk


- you can make your own chalkboard table by painting an existing small table with chalkboard paint
- Easel
- Sand box with pail and shovel
- Dress up box
- Board books
- Simple jigsaw puzzles
- Musical instruments – you can look for toy versions that pair light and sound when playing the instrument
Remember not all games/toys have to be costly or expensive! Time and time again, parents say their children love playing with household items. Get creative by putting a holiday spin on toys and games your children love. Feel free to share your ideas with other parents on our facebook page….
If you have questions about your child’s development, please call us at 513-755-6600 or visit our website at https://www.abcpediatrictherapy.com