 Skip to content
Month: May 2019
If you and others are having a difficulty time understanding what your child is saying and they are demonstrating speech sound errors, your child likely has an articulation or phonological disorder. Don’t let the long names or the word “disorder” intimidate you! These are simply referring to the intelligibility (or clarity) of your child’s speech and can be remediated by a speech-language pathologist. Here is a great chart to follow:

If your child is producing some speech sound errors beyond what is typical for their developmental age, and are considered “mildy” unintelligible, it is likely an articulation disorder.
Articulation Disorder- strategies for home carryover
1) Practice your child’s speech sound being targeted in therapy in a mirror!

2) Practice your child’s speech sound in a book! This will increase their awareness of the targeted sound. Find books from your local library that have repetitive words with the appropriate speech sounds to target. (For example, if the sound is /g/, try “Go Dog GO!” by P.D. Eastman)
3) Draw attention to your mouth while speaking and use cues to your mouth so that the child can follow your cues for correct speech production on the targeted sounds.
If your child is “highly” unintelligible due to an excessive use of phonological processes that are typical for development, then it is likely a phonological disorder. Please refer to the phonological processes chart from the American-Speech and Hearing Association (ASHA) here: https://www.asha.org/Practice-Portal/Clinical-Topics/Speech-Sound-Disorders-Articulation-and-Phonology/Selected-Phonological-Processes/
Phonological Disorder- strategies for home carryover
1) If your child is deleting final speech sounds in words, make a “snake” down your arm with your pointer finger and “stop” the snake to mark the final speech sound.
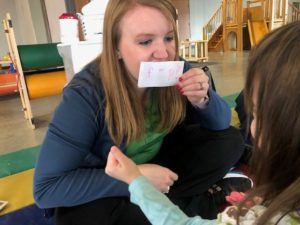
2) To increase awareness of speech sounds, hide your mouth using a small piece of paper and say a targeted word (with the speech sound targeted) correctly and correctly to see if your child can hear the difference and ask them to give you a “thumbs up!” or “thumbs down” to that word with the speech sound. (pic as follows) For example, say “ship” and “sip” if the child is having a difficult time producing the /s/.
3) Minimal pair practice- using rhyming words that have the initial speech sound being substituted with the appropriate production. For example, if a child is producing the s/z, you would have the child say “sip” and “zip” or “sap” and “zap” so they can feel the difference of productions and increase their awareness of productions and practice the sounds.
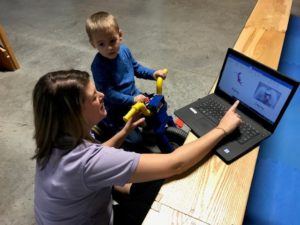
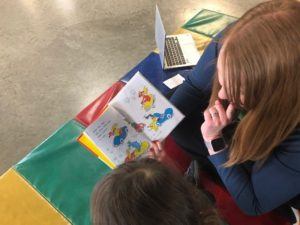
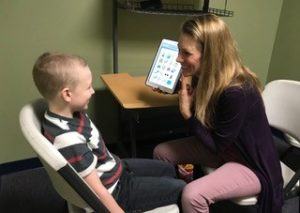
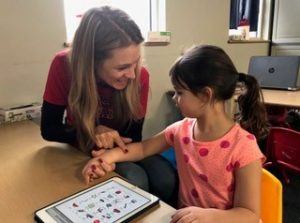
At ABC, our ASHA certified and licensed speech-language pathologists can help remediate speech sound errors. Learning through play is crucial to your child’s development and we provide a sensory-enriched experience to allow for kids to target their speech sounds in a fun, play-based approach! Please visit our website https://www.abcpediatrictherapy.com for answers to your questions.
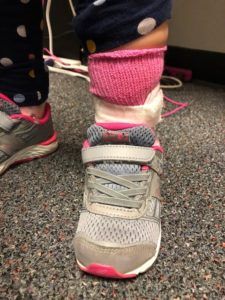
Orthotics are used for many different reasons, and can help kiddos achieve their goals. However, most parents do not know what to expect when getting orthotics for the first time. Here you will find some information that is good to know for first time orthotic users.
Wear Schedule – when wearing orthotics for the first time, it is important to know that the kiddo does not wear them 24/7 right away. Their skin, feet, and sensory system needs to accommodate to this new feeling and new positioning. Therefore, it is recommended the child start off wearing the orthotics for about 1 hour, which is typically done during the therapy session when they receive them. If the child is tolerating them well and the orthotics seem to fit correctly without need for adjustments, you slowly build tolerance by adding another hour until they are able to tolerate wearing them all of the time.

Monitor for Redness – as mentioned above, the kiddo’s systems need to get used to this new thing on their feet and this new positioning it puts their feet in. Therefore, it is normal that there may be mild pink or red areas that go away within 30 minutes or less once the orthotics are taken off. However, it is important to monitor these areas, especially if a deeper or more vibrant red color as this could indicate areas where the brace may need altered. This type of redness will take longer than 30 minutes to begin to fade. If this occurs, stop usage of the orthotics and give the therapist a call so we can assess what changes need to be made.

Shoes – majority of orthotics are designed to be worn with shoes. However, shoes that fit orthotics can be difficult to find, especially since kids grow so fast. It is recommended that you wait to buy new shoes until you have the orthotics in person, that way you can make sure they fit in the shoe before you buy them. A wider shoe usually works better, such as New Balance. There are also shoes designed to better fit orthotics, such as Plae and Striderite. However, any shoe that fits your child’s foot with the orthotic will work; there is no one particular brand that you must buy. 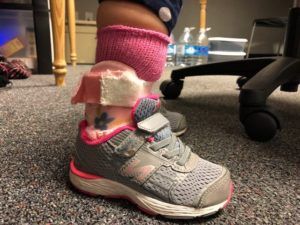
If you have any questions about the ordering process, about the fit of your child’s orthotics, or if you think orthotics may help your child, please reach out to your kiddo’s therapist. We love to help and answer all questions in order to provide the best care possible.
Look what I can do!
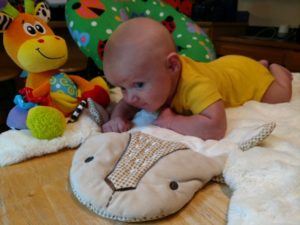
At 0-3 months old, I will be able to start holding my head up when placed on my tummy. At first, I will be looking straight down, but with practice, I will be able to lift it even higher. Make sure my arms are under me so I learn to push up.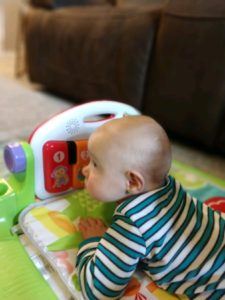
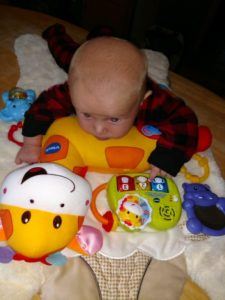
At 3-6 months old, I will be able to push up more through my arms so I can really look around. I will be able to reach for toys and bring them to my mouth. Make sure I have plenty of toys!
At 6-9 months old I will start to move around while on my tummy. I will pivot and I may learn to move backwards before I am strong enough to move forward. I love to explore!
At 9-12 months old I will be strong enough to push up onto my hands and knees for crawling. Watch out, world! Here I come!
Tummy time should always be supervised and done when your child is awake.
Tummy time should be done when your baby is happy – not tired or hungry.
Tummy time should not be done right after your baby has eaten. This can put pressure on a full tummy and cause your baby to spit up.
Perform tummy time for short intervals (10 minutes), several times per day.
Use a nursing pillow or small towel roll under the arms. This takes some of the weight off of the arms, making it easier to lift his head.
Use toys and music to make it fun.
Get on the floor so your baby can look at you.
Hold your baby on your chest, facing you, and recline back so you are face to face.
Babies loves to hear your voice and see your face!
When and how much?
Tummy time is needed every day and should begin the first day you bring your infant home from the hospital.
 Start with just a few minutes at a time, several times per day. Gradually build up, as your baby is able to tolerate more.
Why tummy time?
Tummy time helps your baby get stronger in order to develop his skills.
Tummy time is needed to promote motor skills such as sitting up and crawling.
It strengthens the hands for holding onto toys or a bottle and helps to develop vision.
Babies who do not spend time on their tummy are more likely to have delays in their motor skills.
What if my baby doesn’t like it?
Hang in there and keep trying! With practice and toys to make it fun, your child will learn to enjoy it.
Keep that perfectly shaped head
Babies who are placed too much in swings, car seats and on their backs and not enough on their tummy can end up having a misshapen head.
Putting your baby on his tummy several times throughout the day keeps pressure off of the back of the head and keeps that perfectly round little head.
Avoid having your baby sleep in a swing or car seat, if you can. Babies should be placed on their backs to sleep on a flat surface. The flat surface allows your baby to turn his head to either side, helping to form the perfect head shape.
Tummy time should be fun and provide learning opportunities.
Remember to place your child on their back to sleep.
If you have questions about your child’s development, visit https://www.abcpediatrictherapy.com. We love to help!