 Skip to content
child
Look what I can do!
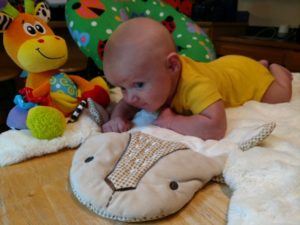
At 0-3 months old, I will be able to start holding my head up when placed on my tummy. At first, I will be looking straight down, but with practice, I will be able to lift it even higher. Make sure my arms are under me so I learn to push up.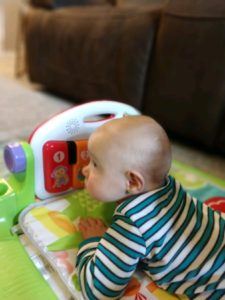
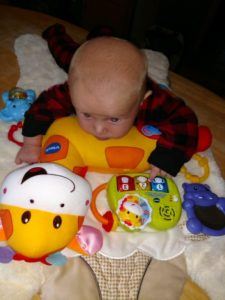
At 3-6 months old, I will be able to push up more through my arms so I can really look around. I will be able to reach for toys and bring them to my mouth. Make sure I have plenty of toys!
At 6-9 months old I will start to move around while on my tummy. I will pivot and I may learn to move backwards before I am strong enough to move forward. I love to explore!
At 9-12 months old I will be strong enough to push up onto my hands and knees for crawling. Watch out, world! Here I come!
Tummy time should always be supervised and done when your child is awake.
Tummy time should be done when your baby is happy – not tired or hungry.
Tummy time should not be done right after your baby has eaten. This can put pressure on a full tummy and cause your baby to spit up.
Perform tummy time for short intervals (10 minutes), several times per day.
Use a nursing pillow or small towel roll under the arms. This takes some of the weight off of the arms, making it easier to lift his head.
Use toys and music to make it fun.
Get on the floor so your baby can look at you.
Hold your baby on your chest, facing you, and recline back so you are face to face.
Babies loves to hear your voice and see your face!
When and how much?
Tummy time is needed every day and should begin the first day you bring your infant home from the hospital.
 Start with just a few minutes at a time, several times per day. Gradually build up, as your baby is able to tolerate more.
Why tummy time?
Tummy time helps your baby get stronger in order to develop his skills.
Tummy time is needed to promote motor skills such as sitting up and crawling.
It strengthens the hands for holding onto toys or a bottle and helps to develop vision.
Babies who do not spend time on their tummy are more likely to have delays in their motor skills.
What if my baby doesn’t like it?
Hang in there and keep trying! With practice and toys to make it fun, your child will learn to enjoy it.
Keep that perfectly shaped head
Babies who are placed too much in swings, car seats and on their backs and not enough on their tummy can end up having a misshapen head.
Putting your baby on his tummy several times throughout the day keeps pressure off of the back of the head and keeps that perfectly round little head.
Avoid having your baby sleep in a swing or car seat, if you can. Babies should be placed on their backs to sleep on a flat surface. The flat surface allows your baby to turn his head to either side, helping to form the perfect head shape.
Tummy time should be fun and provide learning opportunities.
Remember to place your child on their back to sleep.
If you have questions about your child’s development, visit https://www.abcpediatrictherapy.com. We love to help!

Ever wonder what you would write if you could write a letter to your child?
Our children are our most precious gift. What would you say if you were to write a letter to your child?
I know I would want to inspire. I would not tell them they can be anything they want to be. Instead I would teach them to truly inspect. What are you good at? What are you not so good at? Do more of what you are good at. Learn more about what you like. Network with those who do what you want to do. Then go after it. Do not stop until your goals are met.
Teach them that by helping others you help yourself.
Know thyself. Know what you want and what you need and go after it.
Set goals. Don’t just set goals. Strive to reach them. Make it NOT an option NOT to meet them. Break long term goals into several short term goals and go after them all.
Let them know that problems are just barriers to be overcome.
Encourage each to own their mistakes/their problems and learn from them rather than blame others. This will push you to be the leader I know you can be. You will learn to break a problem down into tasks to be completed and soon the problem becomes a solution. Then this child will look at each problem as merely an inconvenience that will be overcome. Each problem will be a barrier that they will remove. My child will be able to minimize the stress in their life as they will be able to solve problems.
I will show them that communication is vital to any successful relationship. In fact, believe it is the reason most relationships fail. Know your wants and needs so you can communicate them to those that are important to you. Then be a good listener. Understand the wants and needs of those important to you and work to meet them. Be flexible as wants and needs can and will change on both sides. That is ok. Just be open to change and be willing to do your best to give those you love what they need.
Above all love. Love in abundance and it will come back to you.
What would you write in the letter to your child?
- Speech Sound Grab Bag: Fill a medium sized gift bag or tote bag with small objects/pictures that begin (or end) with the targeted sound. Have your child take out each object and practice saying that word and talk about what he/she found. Your child will love digging into the bag and feeling the objects inside to see what is hidden inside!
For example: /k/ sound objects could include keys, (pretend) cookie, cup, kit-kat bar, rubber duck (quack-quack AND final /k/ in duck), book, ketchup packet, small stuffed animal cat, cork, can of soda or coke, small cake candle, pretend slice of cake, napkin, plastic/toy fork, packet of hot cocoa)
- Flashlight Game: Get out a flashlight and place pictures or objects that target the speech sound and place them inside child’s bedroom or other room, turn off the lights and have the child shine the light around the room to “find” the objects. Your child will love playing with the flashlight and searching for the cards or objects.


- Memory match up: Make small cards (with photos or clipart) with targeted speech sound so that you and your child

 can play the memory matching game. Place all cards face down and have your child see if they can remember where the cards are and whoever has the most matches wins the game.
 - Book Reading: Choose a book from your local library that targets the speech sound, read with your child (or maybe they can read to you!)
- Board Games: Incorporate your child’s favorite board game and upon taking a turn, have your child say a word 2-3 times targeting that speech sound (see if your child’s speech pathologist can give you a practice word list or photocopied pics). Game suggestions: Candyland, Chutes and Ladders, UNO, Guess Who?)

- Sound guessing game: Practice “sound discrimination” at
- home by hiding your mouth with a piece of construction paper. Say a word that begins with the targeted sound (i.e. “seat”) and ask the child, “Did I say the /s/ or the /sh/ sound?” Choose words that rhyme but begin with the targeted speech sounds. (i.e. cake/take)
- Build a “road” for cars: line picture cards for targeted speech sound face down, have your child help you build a “road” and turn over the cards as the car “drives’ along the road, saying the sound as the cards are turned over.
- B-I-N-G-O: Use a bingo board and markers/chips that contain pictures of the targeted speech sound. This is a great way to include multiple family members!
- Coloring: Use coloring sheets that include popular cartoon characters or scenes with targeted speech sounds. Sit with your child and have the child say one of the targeted words before receiving a crayon or marker to color a certain part of the coloring sheet. This way they are coloring as they are practicing the sounds.
- Baking or Crafting: Have your child bake or put together a craft and target that sound during the activity. Examples of targeted words: cookies, cake, rolling pin, pat-pat-pat, push, cookie cutters, shapes, cook, bake, hot, mix, stir, egg, break, roll, pull, glue, stick/sticky, cut, in, out.
Large Motor:
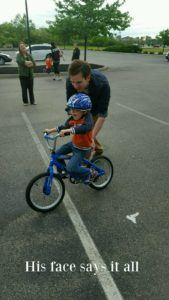
Bike or scooter riding
Jump rope
Throw, kick and catch a ball
Hit a ball with a racket or bat
Swim
Hike
Outdoor sports like kick ball, baseball, soccer
Follow a line of sidewalk chalk along a jagged and curved path.
Water balloon toss or water balloon baseball
Hopscotch
Small motor, Sensory and Motor Planning:
Sidewalk chalk
Scavenger hunt outside (find something: rough, smooth, green, pink, on top, under etc)
Obstacle course outside
Swim for balls or diving toys with sight words
Fill spray bottles with liquid watercolors, spray on easel outside with watercolor paper.
“Paint” with water, get out the old paintbrushes, paint rollers and mops along with a bucket of water and have the kids “clean” or “paint” the deck or pavement.
Paint rocks or a flower pot for the garden
Catch fireflies
Pick flowers
Make paper airplanes
Make ice cream or popsicles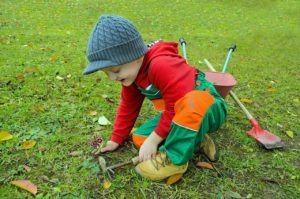
Play I-Spy on road trips
Leaf rubbing
Plant flowers
Make a windsock
Language:
Swim for balls or diving toys with speech words on them
Name items that start with certain letters or sounds while taking a walk
Talk about what is on top/under/next to while running errands
Ask Who, What, When, Where questions
Describe items outside or on road trips
If you have concerns about your child’s development, go to http://checklist.abcpediatrictherapy.com and fill out this checklist about your child. You will receive tips and tricks on how you can help your child. You will also find much information at https://www.abcpediatrictherapy.com.